
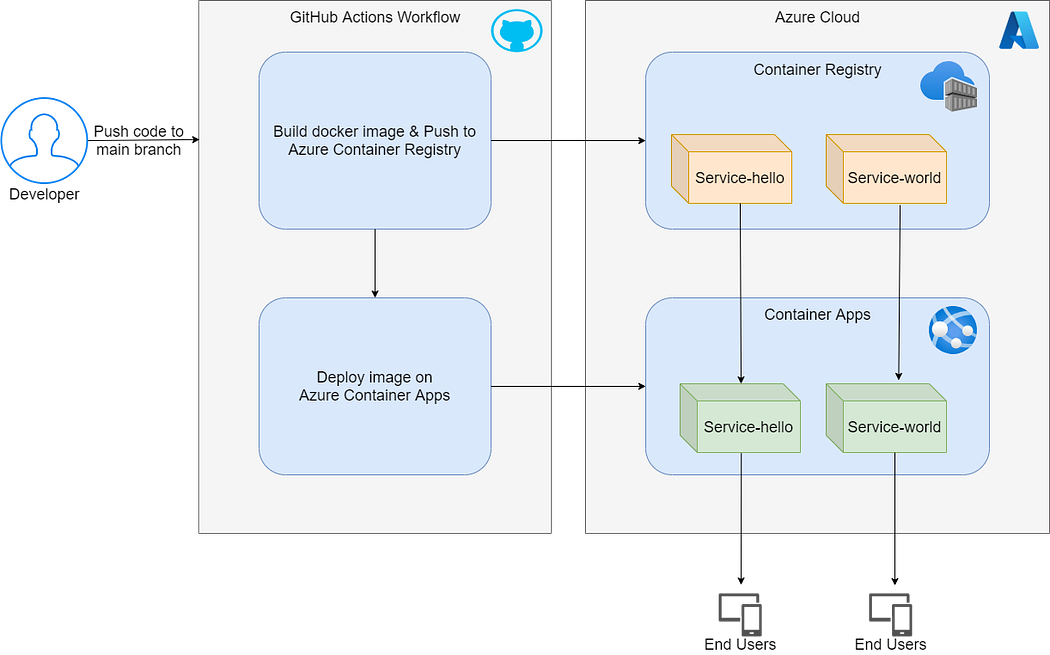
Continuous Integration and Continuous Deployment (CI/CD) have become essential to streamline development, automate repetitive tasks, and improve code quality and delivery speed. In this blog post, we’ll explore setting up a CI/CD pipeline for a multi-module Java application using GitHub Actions, Docker, and Azure Container Apps. This guide covers the entire process — from building Docker images for each service to deploying them on Azure.
Prerequisites
Before we dive into the setup, ensure you have the following:
- A multi-module Java project structured as microservices.
- An Azure account with access to Azure Container Apps and Azure Container Registry.
- A GitHub repository to host your project code.
Project Structure
In this example, we have a Java project with two services: service-hello and service-world. We aim to automate the process of building and pushing these services as Docker images and deploying them to Azure Container Apps whenever code is pushed to the main branch.
Here’s what the project structure looks like:
multi-module-hello-world/
├── pom.xml               # Parent POM file
├── service-hello/
│   ├── pom.xml
│   ├── src/main/java/...
│   ├── Dockerfile
├── service-world/
│   ├── pom.xml
│   ├── src/main/java/...
│   ├── Dockerfile
Step 1: Creating the Dockerfile
Creating a Dockerfile for each of your Java microservices is essential for building the Docker images that will be deployed to Azure Container Apps.
We will create a dockerfile with multi-stage build process. The first stage uses Maven with OpenJDK 17 to compile the application and package it into an executable JAR. The second stage employs a slim OpenJDK image to run the application, copying the JAR file, exposing required service port, and defining the command to execute the application.
Dockerfile for service-hello
Create a file named Dockerfile inside the service-hello directory with the following content:
# Stage 1: Build the service-hello application
FROM maven:3.8.5-openjdk-17 AS builder
WORKDIR /app

# Copy the root pom.xml for dependency resolution and project structure
COPY ../pom.xml /app/pom.xml
COPY ../service-hello/pom.xml /app/service-hello/pom.xml

# Copy the source files of the entire project into the container
COPY .. /app

# Build the service-hello module specifically
RUN mvn clean package spring-boot:repackage

# Stage 2: Run the service-hello application
FROM openjdk:17-jdk-slim
WORKDIR /app

# Copy the JAR file from the builder stage
COPY --from=builder /app/service-hello/target/service-hello-1.0-SNAPSHOT.jar app.jar

# Expose the port
EXPOSE 8080

# Run the application
ENTRYPOINT ["java", "-jar", "app.jar"]
Dockerfile for service-world
Create a file named Dockerfile inside the service-world directory with the following content:
# Stage 1: Build the service-world application
FROM maven:3.8.5-openjdk-17 AS builder
WORKDIR /app

# Copy the root pom.xml for dependency resolution and project structure
COPY ../pom.xml /app/pom.xml
COPY ../service-world/pom.xml /app/service-world/pom.xml

# Copy the source files of the entire project into the container
COPY .. /app

# Build the service-world module specifically
RUN mvn clean package spring-boot:repackage

# Stage 2: Run the service-world application
FROM openjdk:17-jdk-slim
WORKDIR /app

# Copy the JAR file from the builder stage
COPY --from=builder /app/service-world/target/service-world-1.0-SNAPSHOT.jar app.jar

# Expose the port
EXPOSE 8081

# Run the application
ENTRYPOINT ["java", "-jar", "app.jar"]
Step 2: Setting up the Azure Environment
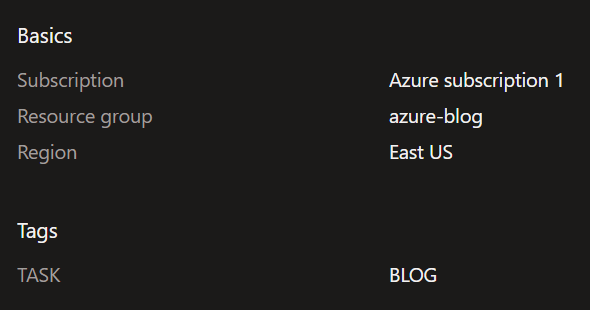
- Create an Azure Resource Group in your chosen region.
2. Create a azure container registry javamicroserviceapp
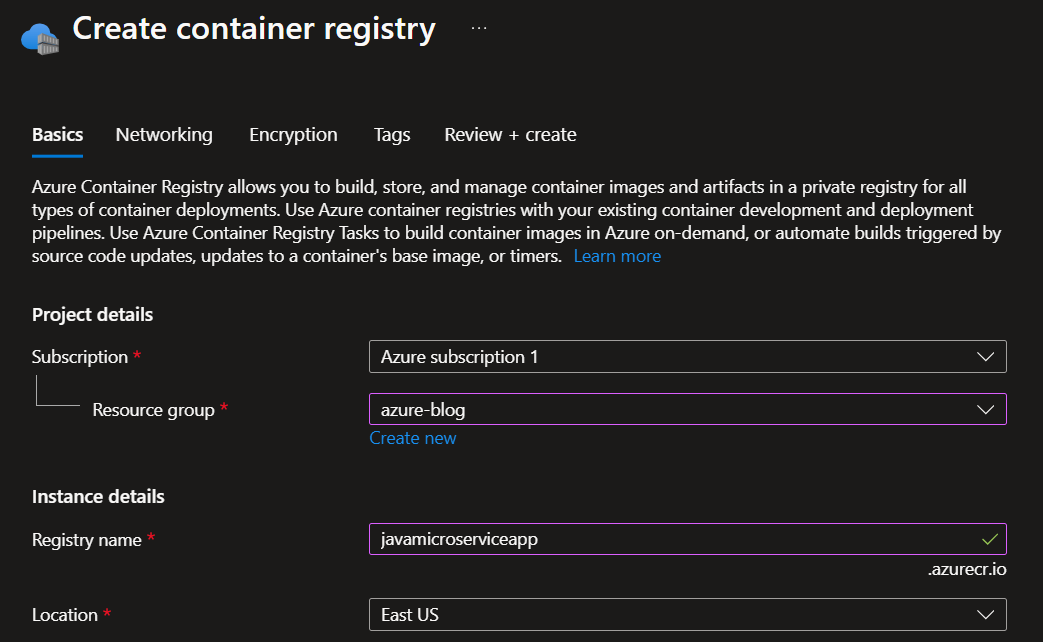
NOTE: I have set the networking to Public access and Disabled the encryption.
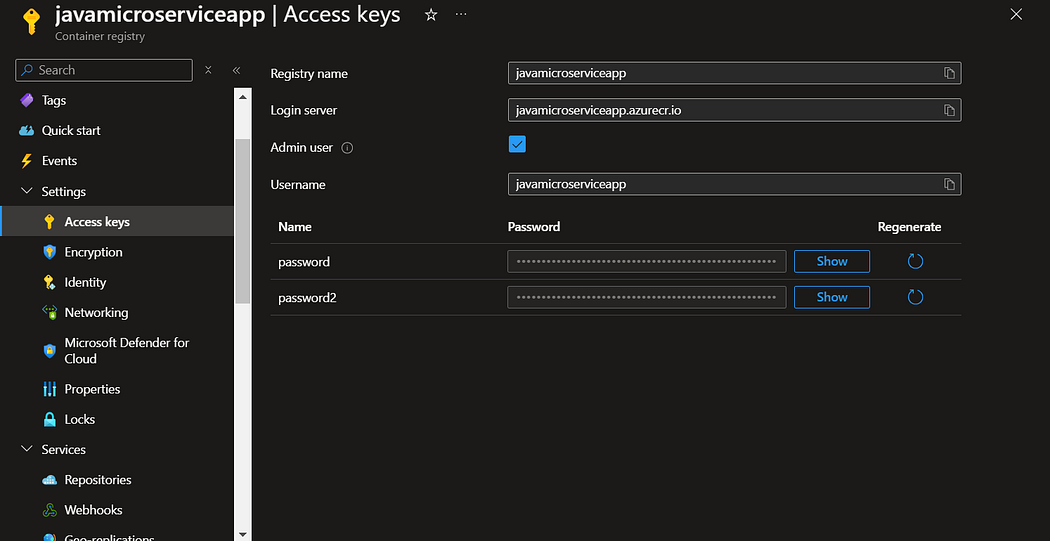
Navigate to access keys, enable admin user and save the login server credentials for future usage.
3. Build and push docker images for each service
# Login to azure account
az login

# Azure container registry login
az acr login --name javamicroserviceapp

# Build the service-hello docker image
docker build -t service-hello:v1 -f service-hello/Dockerfile .

# Tag the service-hello docker image
docker tag service-hello:v1 javamicroserviceapp.azurecr.io/service-hello:v1

# Push the service-hello docker image
docker push javamicroserviceapp.azurecr.io/service-hello:v1

# Build the service-world docker image
docker build -t service-world:v1 -f service-world/Dockerfile .

# Tag the service-world docker image
docker tag service-world:v1 javamicroserviceapp.azurecr.io/service-world:v1

# Push the service-world docker image
docker push javamicroserviceapp.azurecr.io/service-world:v1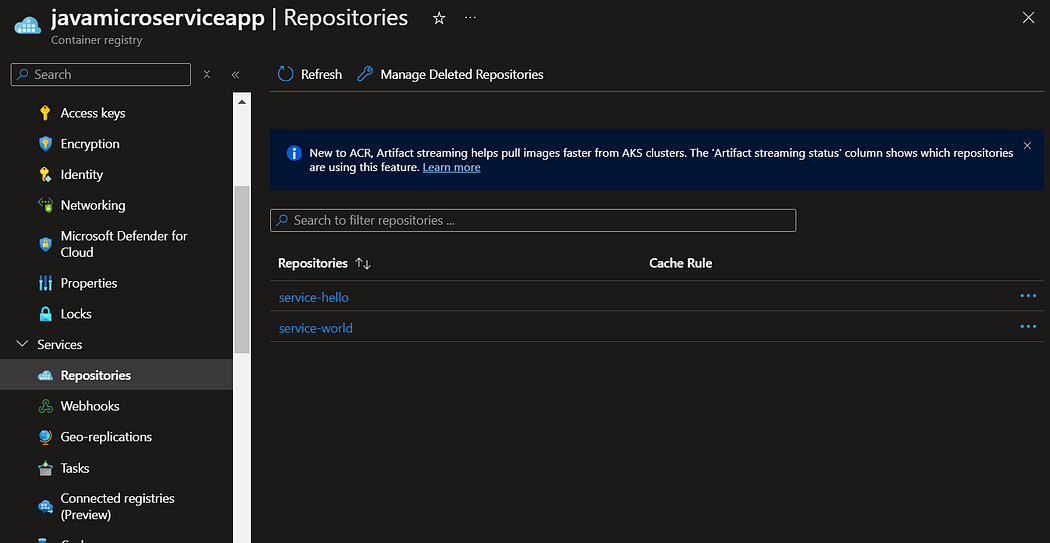
4. Create azure container app for both these services.
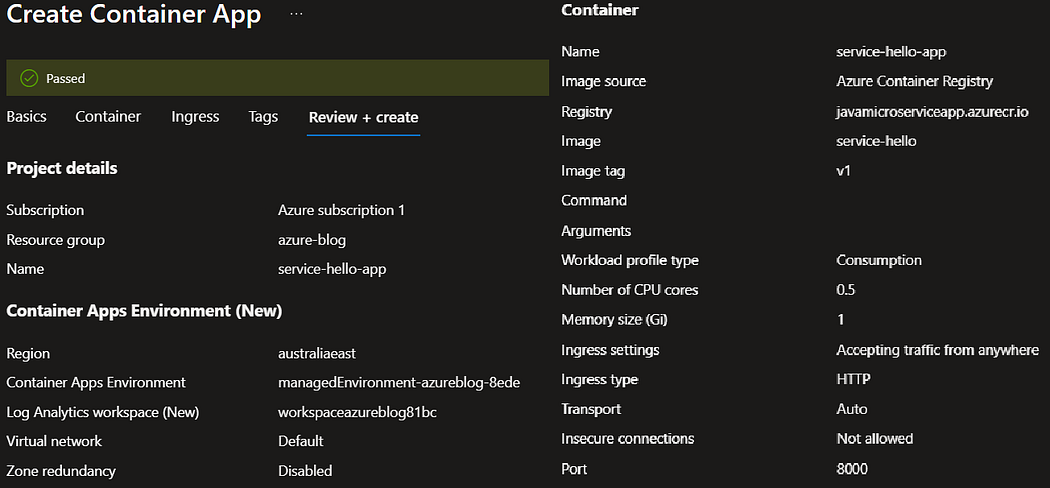
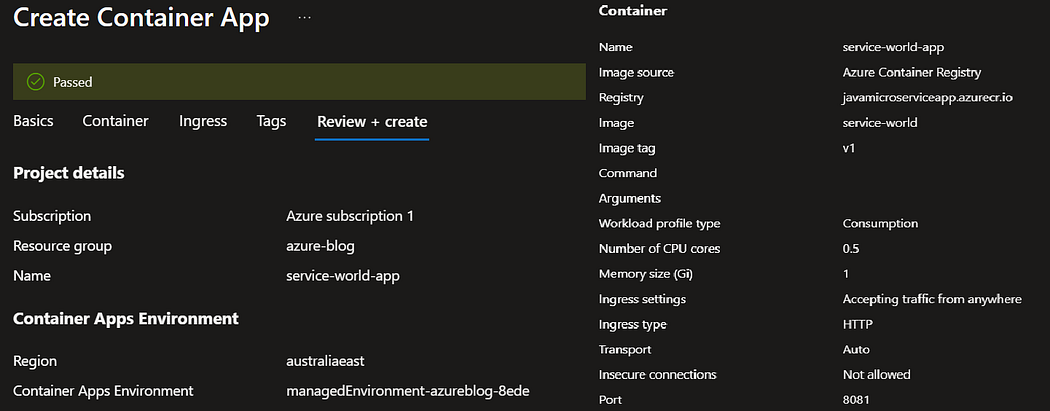
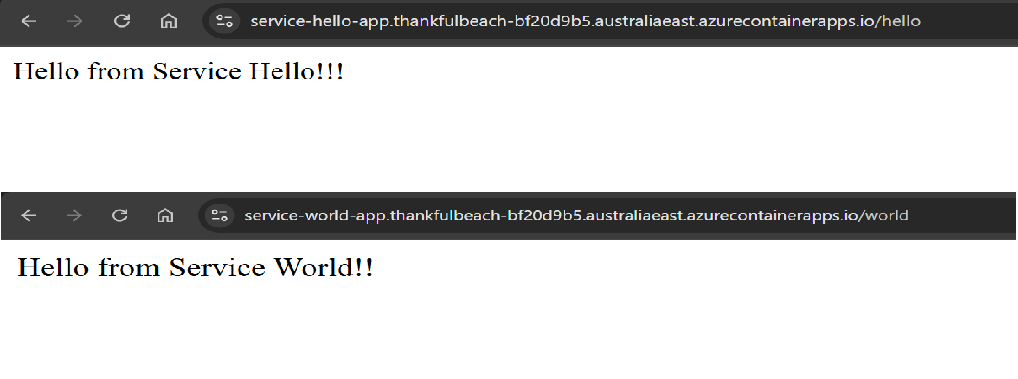
Navigate to application URL to check once both the services gets deployed.
Step 3: Configure Azure and GitHub secrets
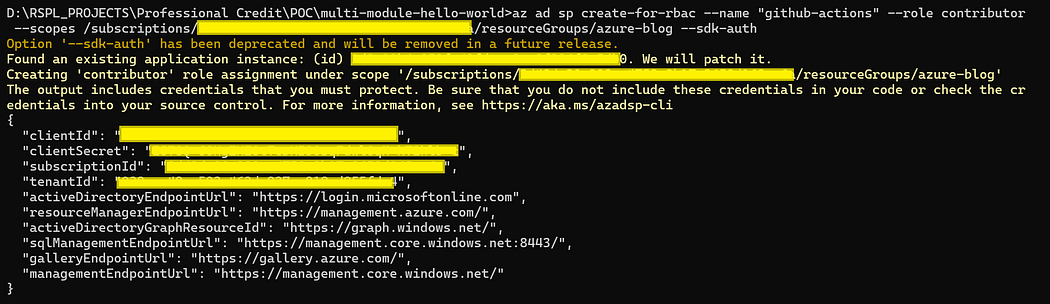
- Azure Service Principal: We’ll need an Azure service principal for GitHub Actions to authenticate with Azure.
Run the following command to create azure service principal
az ad sp create-for-rbac --name "github-actions" --role contributor --scopes /subscriptions/{subscription-id}/resourceGroups/{resource-group} --sdk-authReplace {subscription-id} and {resource-group} with your actual Azure subscription ID and resource group. This will output JSON credentials.
2. Store Credentials in GitHub Secrets:
- Go to your GitHub repository.
- Navigate to Settings > Secrets and variables > Actions.
- Create the following secrets:
AZURE_CREDENTIALS – The service principal JSON output from the Azure CLI.
ACR_NAME – The name of your Azure Container Registry.
RESOURCE_GROUP – The Azure resource group for your Container Apps.
CONTAINER_REGISTRY_1 – The name of your 1st Azure Container Registry.
CONTAINER_REGISTRY_2 – The name of your 2nd Azure Container Registry.
CONTAINER_APP_ENVIRONMENT_2 – The name of your 2nd Azure Container App.
DOCKER_USERNAME and DOCKER_PASSWORD – For ACR, use your Azure login credentials.

Step 4: Create GitHub Actions Workflow
Next, let’s create a GitHub actions workflow in our repository at.github/workflows/deploy.yml.
name: Deploy to Azure Container Apps

on:
  push:
    branches:
      - main  # Trigger the workflow on push to the main branch

jobs:
  build-and-deploy:
    runs-on: ubuntu-latest

    steps:
      # Step 1: Checkout code with commit history
      - name: Checkout code
        uses: actions/checkout@v2
        with:
          fetch-depth: 2  # Fetch the last two commits for change detection

      # Step 2: Set Commit ID for Tagging
      - name: Set Commit ID as Tag
        run: echo "COMMIT_ID=$(echo ${{ github.sha }} | cut -c1-7)" >> $GITHUB_ENV

      # Step 3: Check which services changed
      - name: Check changed files
        id: changes
        run: |
          if git diff --name-only HEAD^ HEAD | grep -q '^service-hello/'; then
            echo "HELLO_CHANGED=true" >> $GITHUB_ENV
          fi
          if git diff --name-only HEAD^ HEAD | grep -q '^service-world/'; then
            echo "WORLD_CHANGED=true" >> $GITHUB_ENV
          fi

      # Step 4: Login to Azure
      - name: Login to Azure
        uses: azure/login@v1
        with:
          creds: ${{ secrets.AZURE_CREDENTIALS }}

      # Step 5: Install Azure CLI containerapp extension
      - name: Install Azure CLI containerapp extension
        run: |
          az extension add --name containerapp --upgrade

      # Step 6: Login to Azure Container Registry (if any service changed)
      - name: Login to Azure Container Registry
        if: env.HELLO_CHANGED == 'true' || env.WORLD_CHANGED == 'true'
        run: |
          echo ${{ secrets.DOCKER_PASSWORD }} | docker login ${{ secrets.ACR_NAME }}.azurecr.io -u ${{ secrets.DOCKER_USERNAME }} --password-stdin

      # Step 7: Build and Push Docker Image for service-hello
      - name: Build and Push service-hello
        if: env.HELLO_CHANGED == 'true'
        run: |
          docker build -t ${{ secrets.ACR_NAME }}.azurecr.io/${{ secrets.CONTAINER_REGISTRY_1 }}:${{ env.COMMIT_ID }} -f ./service-hello/Dockerfile .
          docker push ${{ secrets.ACR_NAME }}.azurecr.io/${{ secrets.CONTAINER_REGISTRY_1 }}:${{ env.COMMIT_ID }}

      # Step 8: Build and Push Docker Image for service-world
      - name: Build and Push service-world
        if: env.WORLD_CHANGED == 'true'
        run: |
          docker build -t ${{ secrets.ACR_NAME }}.azurecr.io/${{ secrets.CONTAINER_REGISTRY_2 }}:${{ env.COMMIT_ID }} -f ./service-world/Dockerfile .
          docker push ${{ secrets.ACR_NAME }}.azurecr.io/${{ secrets.CONTAINER_REGISTRY_2 }}:${{ env.COMMIT_ID }}

      # Step 9: Deploy service-hello to Azure Container Apps
      - name: Deploy service-hello
        if: env.HELLO_CHANGED == 'true'
        run: |
          az containerapp update --name ${{ secrets.CONTAINER_APP_ENVIRONMENT_1 }} --resource-group ${{ secrets.RESOURCE_GROUP }} --image ${{ secrets.ACR_NAME }}.azurecr.io/${{ secrets.CONTAINER_REGISTRY_1 }}:${{ env.COMMIT_ID }}

      # Step 10: Deploy service-world to Azure Container Apps
      - name: Deploy service-world
        if: env.WORLD_CHANGED == 'true'
        run: |
          az containerapp update --name ${{ secrets.CONTAINER_APP_ENVIRONMENT_2 }} --resource-group ${{ secrets.RESOURCE_GROUP }} --image ${{ secrets.ACR_NAME }}.azurecr.io/${{ secrets.CONTAINER_REGISTRY_2 }}:${{ env.COMMIT_ID }}
This GitHub Actions workflow automates CI/CD for deploying two microservices, service-hello and service-world, to Azure Container Apps. It checks for changes in each service, builds and pushes updated Docker images to Azure Container Registry, and then deploys the relevant service to Azure Container Apps if changes are detected. The workflow also includes authentication steps for Azure and the registry, ensuring secure and efficient deployments.
Our workflow is now ready and it’s now time to test our entire setup 😥

Step 5: Pushing Changes and Testing the Workflow
It’s time to verify our workflow and test the entire setup. Let’s push some changes into service-hello and test the deployment workflow.
As soon as you commit the changes you will notice that your workflow has been triggered.

Now, let’s wait for few minutes till our workflow gets completed.
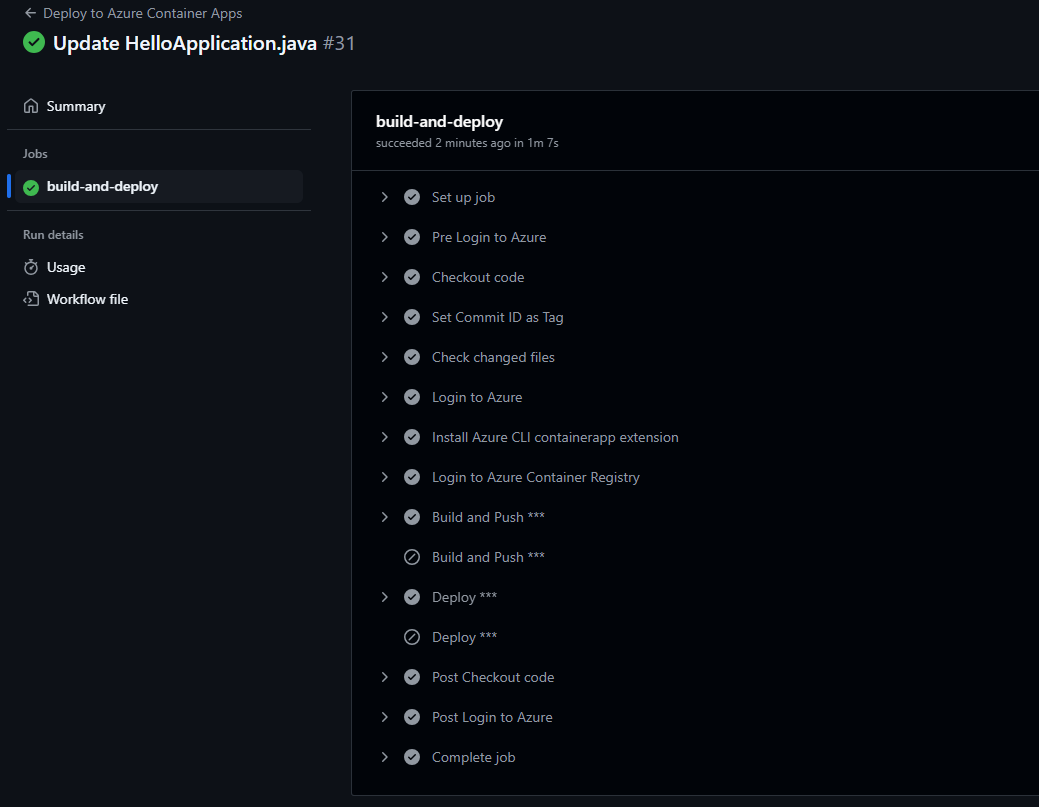
Our workflow has been successfully executed and it built, pushed and deployed the service-hello on our azure environment.
Let’s verify the changes by navigating to azure container registry, container apps and application URLs.
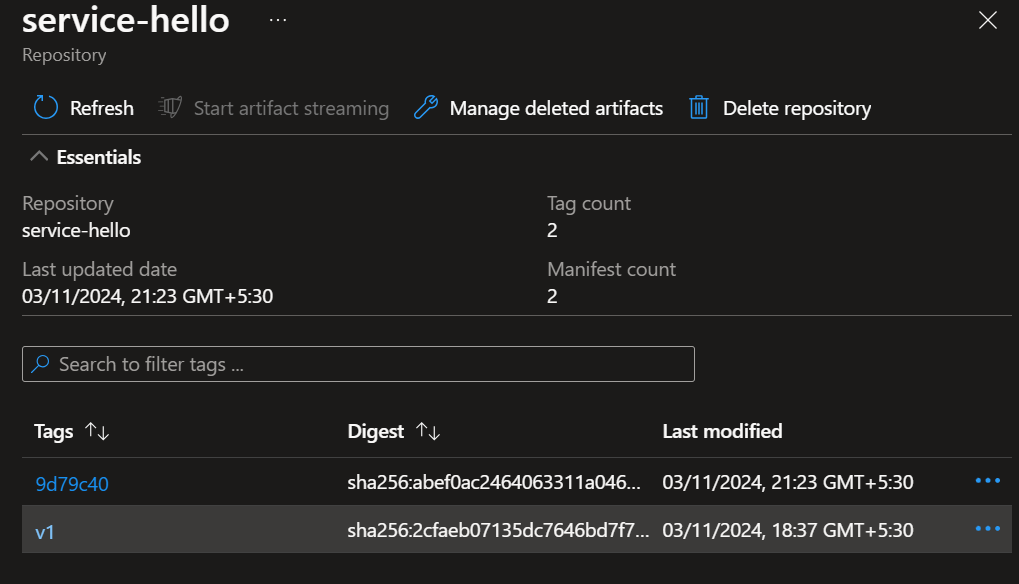
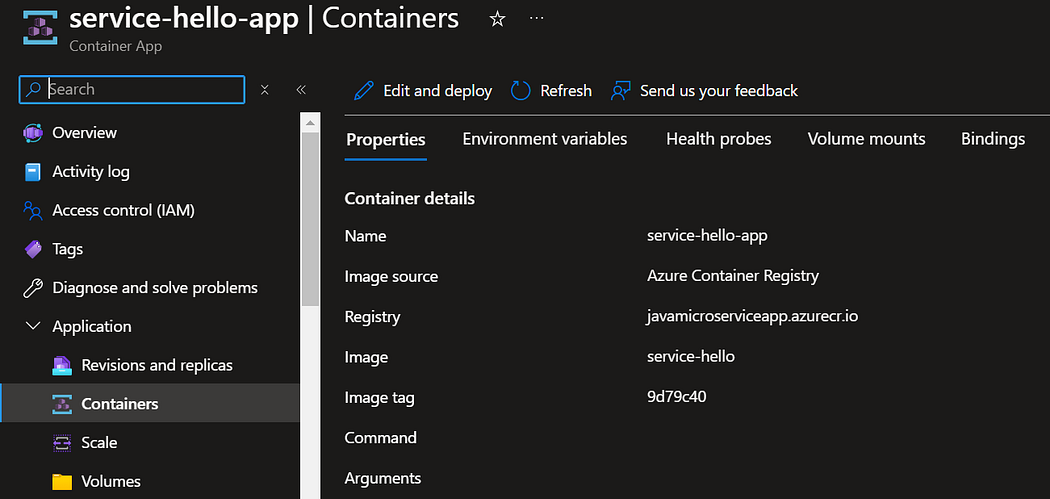
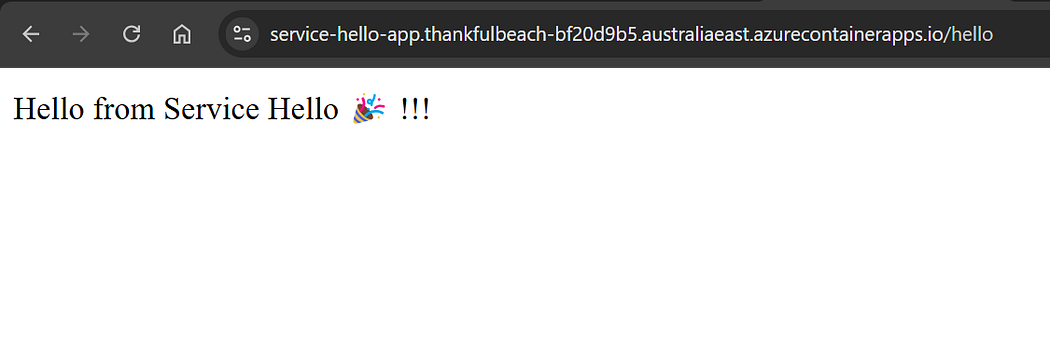
Our entire setup and workflow is working smoothly and it now fully automated the deployment process for our Java microservice project 🎉.

Conclusion
In this blog, we’ve built a robust CI/CD pipeline that leverages GitHub Actions to automate the deployment of a multi-module Java application to Azure Container Apps. This approach not only reduces manual intervention but also ensures that each microservice is independently deployable, enabling faster, more flexible updates.
I hope you found this content informative and enjoyable. Happy coding! 🚀
Thank you for reading! 💚